Sizing by Volume, Not by Habit: A Sharps Container and Collection Audit for Outpatient Practices
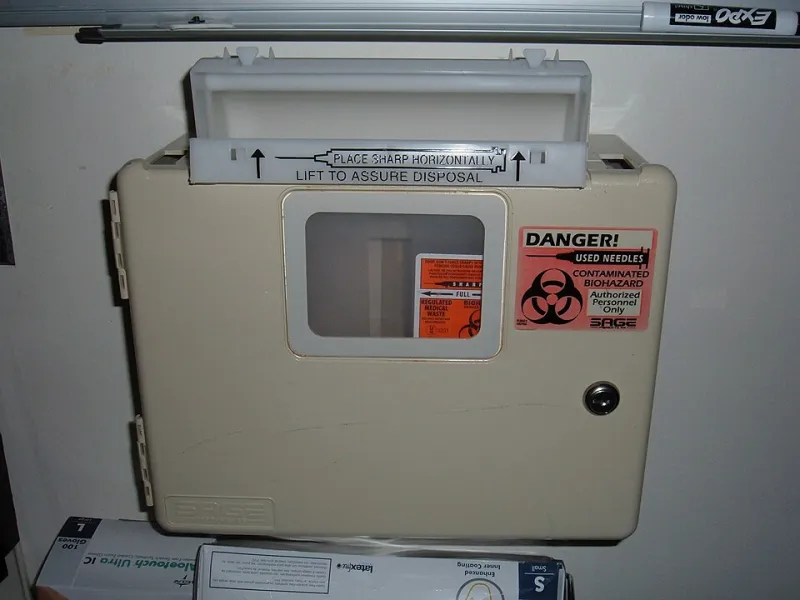
Photo: BrokenSphere, CC BY-SA 3.0, via Wikimedia Commons
Few items in an outpatient suite receive less scrutiny than the sharps container. It is mounted during build-out, reordered by SKU when the supply closet runs low, and exchanged whenever the disposal vendor's truck arrives. The size, the placement, and the pickup cadence are rarely revisited, even after a practice adds a procedure line, hires a provider, or shifts its case mix.
The result is a quiet inefficiency with two faces. Some rooms hold containers that take a month to reach the fill line, occupying wall space and sitting with aging waste. Others are changed weekly because the container is genuinely too small, driving up per-stop charges and prompting staff to press contents toward the lid. Neither pattern is a clinical failure, but both are operational ones, and both are correctable with an audit that takes less time than a single staff meeting.
Where the Mismatch Begins
Three decisions tend to harden into policy without anyone deciding they should. The first is the container size itself, often inherited from a prior practice or copied from a neighboring clinic. The second is placement, frequently settled by whoever installed the wall brackets. The third is pickup frequency, negotiated once at contract signing and then left alone through successive renewals.
Each decision is defensible in isolation. Together they can produce a schedule that has no relationship to the volume of sharps the practice actually generates. A dermatology suite doing dozens of small excisions and a family medicine clinic doing occasional injections may end up with identical containers and identical collection terms, simply because that is what the distributor stocks and the vendor proposed.
Step One: A Measurement Week
Choose one representative week and record, for each clinical room, the container size already in place, the fill level at the start and end of each day, and the number and type of sharps-generating procedures performed. A simple paper log is sufficient. Practices with a strong inventory system can capture the same data through their par-level records, but the manual version has the advantage of being visible to the staff doing the work.
The goal is not precision to the ounce. It is a defensible estimate of daily deposition volume, expressed in the same units as the container rating. Where device mix varies widely, note the approximate volume each device displaces rather than counting devices alone; a large-bore needle and a fine insulin needle are not equivalent occupants of a container.
Step Two: Map Generation Against Placement
Walk the suite during a busy session and note where sharps are actually produced versus where containers are mounted. Federal bloodborne pathogen rules call for containers to be closable, puncture-resistant, and placed as close as feasible to the point of use. That last phrase carries more operational weight than it appears to.
A container two corridors away from the procedure room invites two predictable behaviors: staff carrying uncapped devices through common areas, or staff depositing items in a nearby trash receptacle. Neither is acceptable, and both usually indicate a placement problem rather than an attitude problem. Record the distance from each generation point, the number of containers per room, and any room where staff report routinely walking to another area to dispose of sharps.
Step Three: Calculate Real Capacity
A container's usable capacity is not its rated volume. The fill line, typically marked at three-quarters, is the working limit, and it should be treated as the ceiling rather than a suggestion. The calculation is straightforward:
- Usable capacity equals rated volume multiplied by 0.75.
- Daily deposition equals the average volume of sharps placed in the container per clinical day.
- Days to fill line equals usable capacity divided by daily deposition.
Run the number for each room. A container that reaches its fill line in three days is undersized for that location. One that takes five weeks is oversized. The second case is the more common and the less discussed, because an oversized container feels like a convenience. In practice it means waste sits longer, storage space is consumed, and the practice pays for capacity it never uses.
Step Four: Right-Size the Container
Right-sizing is not a single direction. High-volume procedure rooms often benefit from larger containers and more frequent exchange, which reduces handling and the risk of overfilling between visits. Low-volume rooms, by contrast, are usually better served by smaller containers that reach the fill line within the pickup interval, so that nothing lingers.
The objective is a container that fills in a period roughly matching the collection schedule, with a modest buffer. When the two are aligned, staff stop improvising. Overfilling declines, spare containers stay available, and the practice stops paying for either excessive pickups or unused volume.
Step Five: Reconcile the Collection Contract
Container decisions and contract terms are usually managed by different people, which is how mismatches persist. Pull the disposal agreement and read it against the audit findings. Terms worth examining include the per-stop charge, any per-container exchange fee, minimum pickup requirements, weight-based versus flat-rate disposal pricing, fuel and environmental surcharges, and whether containers are included in the service or billed separately.
Ask the vendor to price an alternative schedule in writing. A practice that moves from weekly to biweekly service in a low-volume suite may find the savings modest but real; one that moves from monthly to biweekly in a busy procedural suite may prevent the overfilling incidents that generate the most expensive problems of all. Contract terms should also be reviewed at each renewal rather than rolling forward by default.
A Working Template
| Room | Procedure mix | Sharps per day (count and approximate volume) | Current container size | Days to fill line | Current pickup interval | Proposed size | Notes |
|---|---|---|---|---|---|---|---|
| Exam 1 | Injections, minor laceration repair | 12 devices, low volume | 5 quart | 34 | Monthly | 2 gallon | Oversized; relocate spare |
| Procedure room | Excisional biopsies | 40 devices, moderate volume | 8 gallon | 6 | Biweekly | 8 gallon | Well matched |
| Infusion bay | Port access, infusions | 15 devices, low volume | 8 gallon | 41 | Biweekly | 3 gallon | Add second point-of-use container |
The Compliance and Safety Edge
The audit is not only a cost exercise. Inspectors and accreditation reviewers look for containers that are closable, properly labeled, replaced at the fill line, and accessible at the point of use. A practice that can produce a completed audit sheet, a placement map, and a documented schedule is in a stronger position than one that can only describe its habits.
Staff workarounds are the clearest signal that something is wrong. Taping a lid, pressing contents down, or routing sharps to a secondary container are all signs that capacity, placement, or frequency has drifted from reality. Treat these reports as data, not as discipline issues.
Revisit on a Schedule
Set a recurring review, annually at minimum, and repeat the measurement week whenever the practice adds a procedure line, changes provider staffing, or renews a disposal contract. Assign a single owner, whether that is the practice manager, the clinical lead, or the supply coordinator, so that the findings do not dissolve after the audit is complete.
Sharps containers are small, inexpensive, and easy to overlook. That is precisely why they reward attention. A modest recalculation of size, placement, and pickup cadence can reduce unnecessary collection charges, cut the volume of unused capacity the practice pays for, and remove the workarounds that compromise safety in ways no one intended.